How to Establish connection
The application can commnunicate with any microcontroller via three defined protocols
Serial
Transport Contorl Protocol
User Datagram Protocol
Note
The application saves all configurations made in a session. When you launch without attempting to configure any parameters, the previously set values are used to establish connection when the connect button is clicked.
Serial Communication
Data can be transmitted in full-duplex mode via serial protocol. The MCU must be configured to transmit serial data via USART or USB. In the absence of this internal peripherals, the user can use an interface converter such as the FTDI converters or opt for the TCP <> or UDP<> options. The first step is to confirm the connection parameters of the serial communication of the MCU. It is necessary to note the baudrate, portnumber, parity stopbits and databits in order to configure the application.
To configure the application for serial communication, follow these steps
Click on the settings button
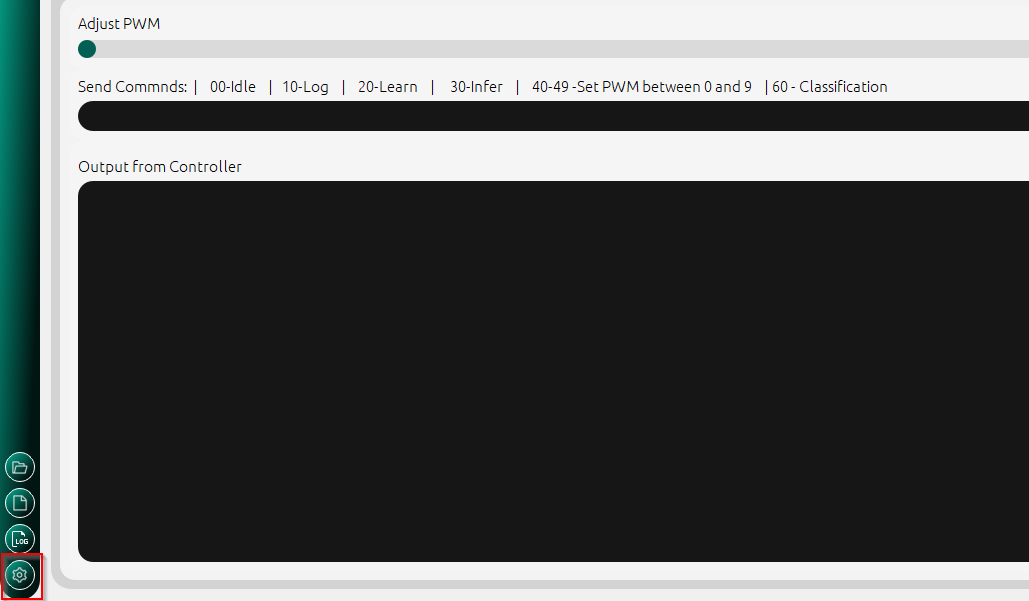
Settings button for configuration
Click on the dropdown list to select Serial from the list of options
Serial Communication Selection
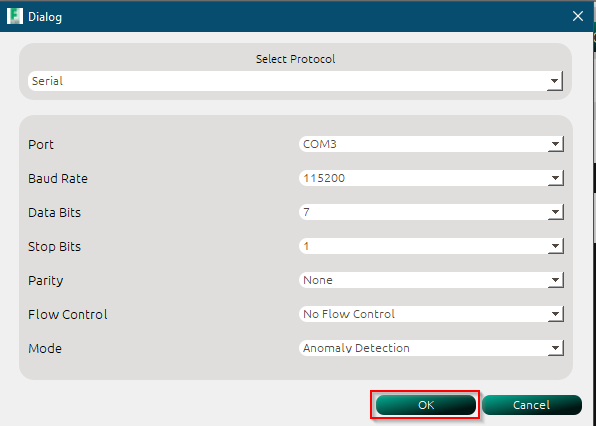
Select connection parameters.
Click the OK button and connect
Click on the connect button
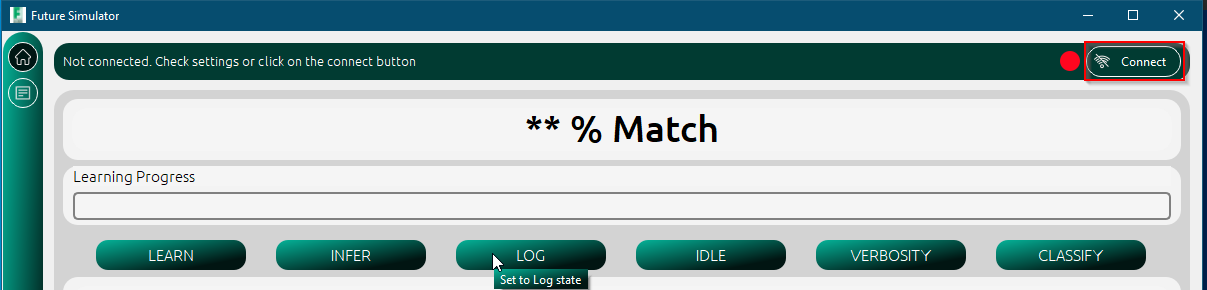
When connection is established, the parameters of the connection are displayed in the connection status bar

Serial Connected UI change
UDP connection
UDP connection is established in the same way as the TCP connection. Since UDP is a connection-less protocol, only a UDP socket which is bound to the address and port provided in the configuration as shown below.
Select UDP from the dropdown
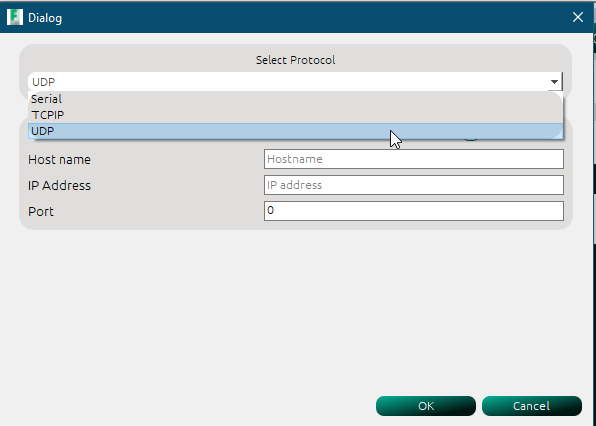
Select UDP Protocol
Enter the ipadress or hostname of your PC.
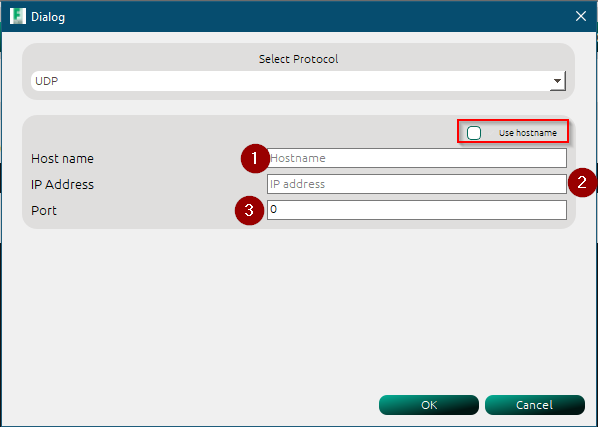
Provide the UDP connection parameters
Tip
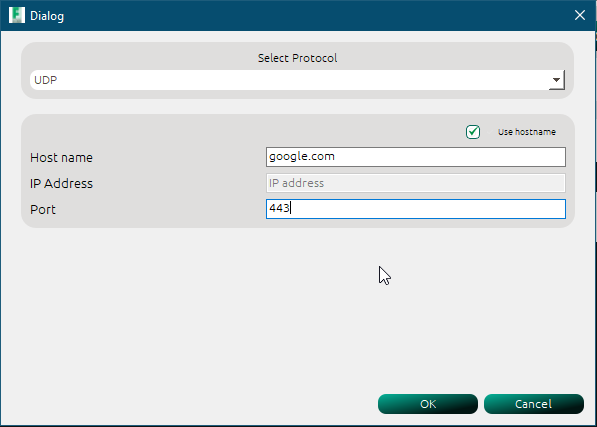
You can click on the :use hostname button to use only the hostname and not the ipadress. Ensure that when using this option, the hostname resolves to a machine (pc) in the same domain as the pc running the application. You can choose to use localhost or 127.0.0.1 instead.
Warning
Only one option can be used at a time. If the use hostname checkbox is checked, then the IP address is greyed out. You can only enter valid IP addresses in the ipadress lineedit. If the value entered is invalid, you cannot save the settings. A vaild IP address is contains 4 octects with values between 0-255 respectively.
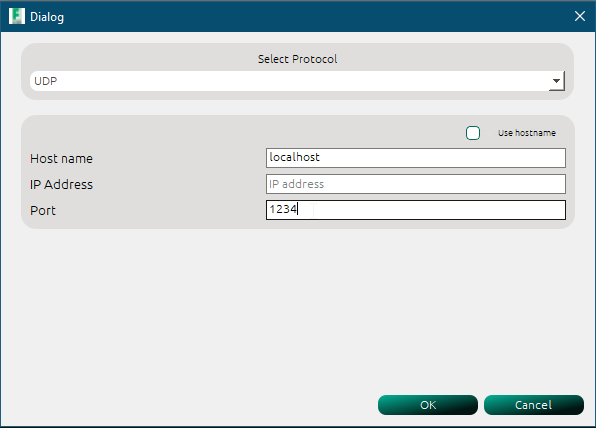
Valid UDP Connection parameters : localhost
Click Ok to save the settings
If previously connected via any of the available protocol, disconnect and reconnect.

Connection status when UDP socket is successfully bound to port and address
Warning
To receive UDP datagrams from your PC, your MCU must implement a UDP client listening to a defined port. This application is set to send to port 1234, therefore the UDP socket must be bound to this port.
TCP connection
To establish TCP connection, follow these steps
Select TCP from the dropdown
Select TCP from the dropdown
Enter the ipadress or hostname of your PC.
Enter the IP address of the TCP server you would like to connect to
Click OK and Connect button

Connection status when TCP connection is successfully established
Warning
google.com was only used for illustrative purposes. To successfully connect, you have to implement a TCP server on the MCU.
With a valid connnection established, data commands can be sent using the configured media to the microncontroller.